
This post covers the process of configuring Windows RADIUS (NPS), deploying a Wireless Profile using Group Policy (GPO) on Windows Server 2012 R2. There are many guides that follow each of these processes for the server-side process as well as on the Cisco 9800 controllers, but I found it difficult to find each of them in the same spot for this specific process. This is a very common task that I complete during my Cisco deployments.
My home lab contents:
- Dell Poweredge T610 running ESXi 6.7
- Windows Server 2012R2
- Domain Services
- Certificate Authority
- NPS/RADIUS
- Windows 10 Pro with Orinoco 802.11ac USB Adapter
- Cisco 9800-CL Virtual Wireless Controller
- Cisco 9120 Wireless Access Point
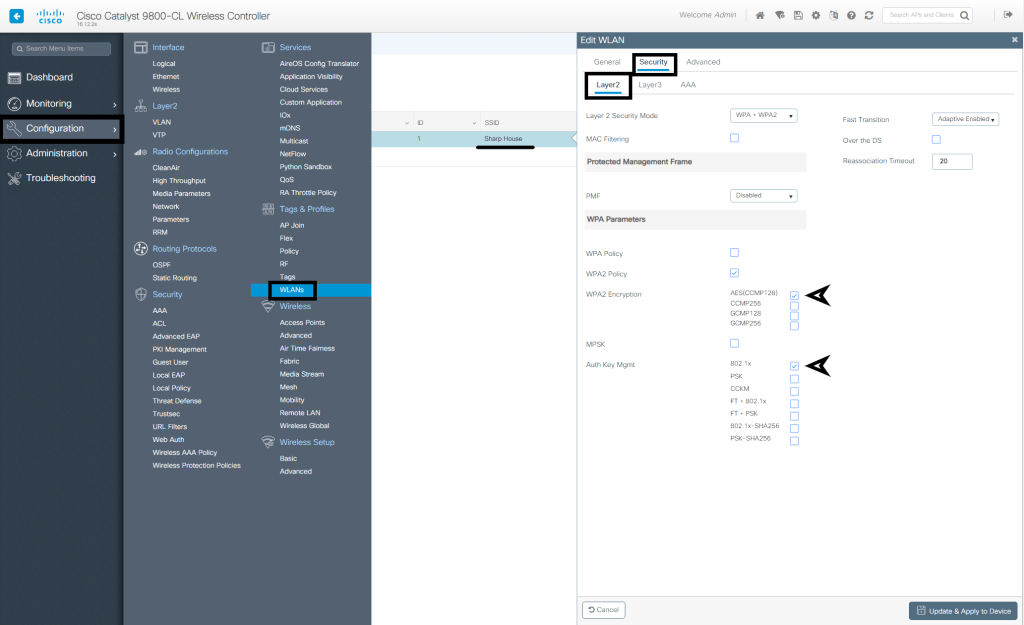
Step 1 – Configure your SSID for WPA2/3-Enterprise Authentication
I configure my Cisco 9800-CL WLC by selecting Configuration > WLANs > Select the applicable SSID > Select Security then Layer2 > and ensure 802.1x is checked.
Step 2 – Configure the Network Policy Server Role
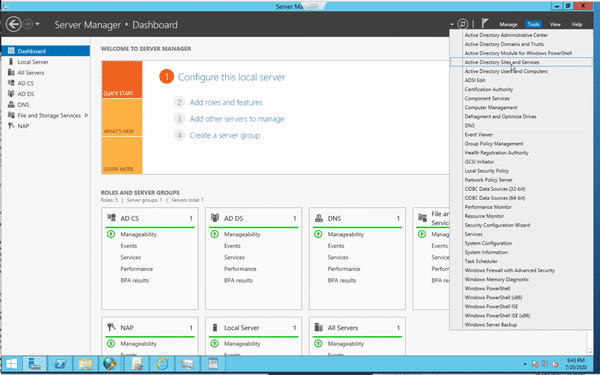
Follow the steps within server manager to install the role, if not already. To configure NPS, launch the management console from Server Manager. First, we need to add a RADIUS client. Depending on your environment, you may need to add the Wireless Controller or each AP. Since my authentication requests will be coming from a Cisco 9800 WLC, I’ve added the controller by IP address along with the shared secret that is configured.
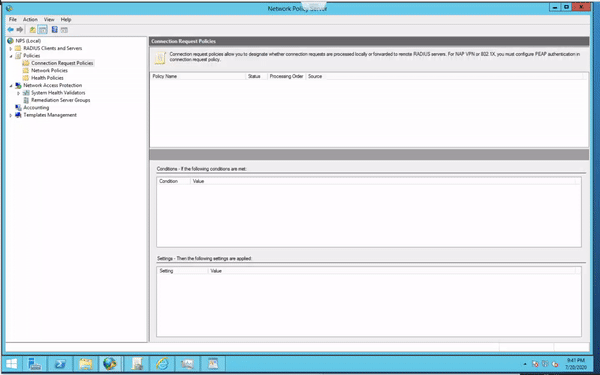
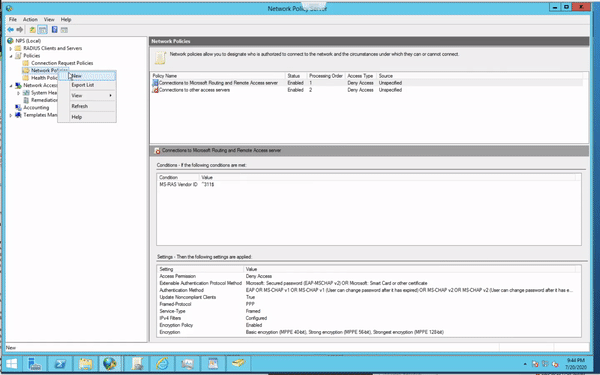
Create Connection Request Policy
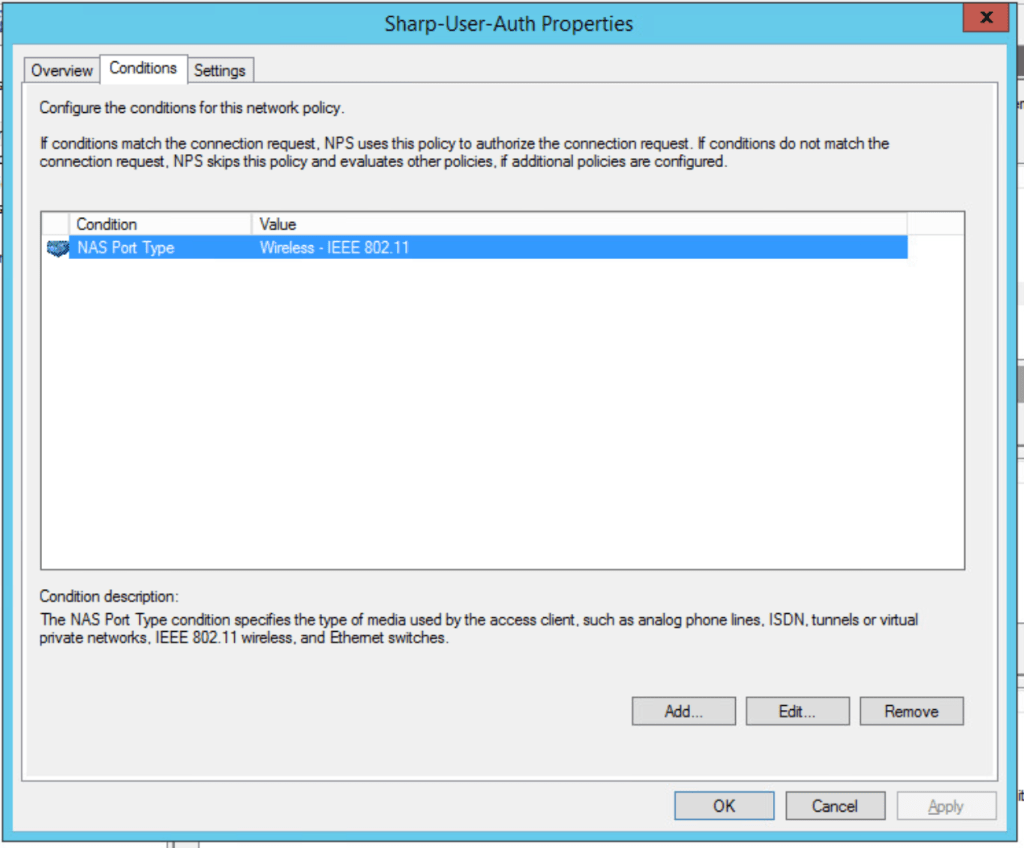
Below is the process of creating a Connection Request Policy using the 802.11 NAS Port Type and specifying the EAP type as PEAP and EAP-MSCHAPv2:
- To create a Connection Request Policy, right click on the appropriate folder and select “New”.
- Give your policy a name and select “Next”:
- In the “Specify Conditions” window click “Add” to add a condition. Scroll to the bottom, click “NAS Port Type” and click “Add”. In the window, select “Wireless – IEEE 802.11”:
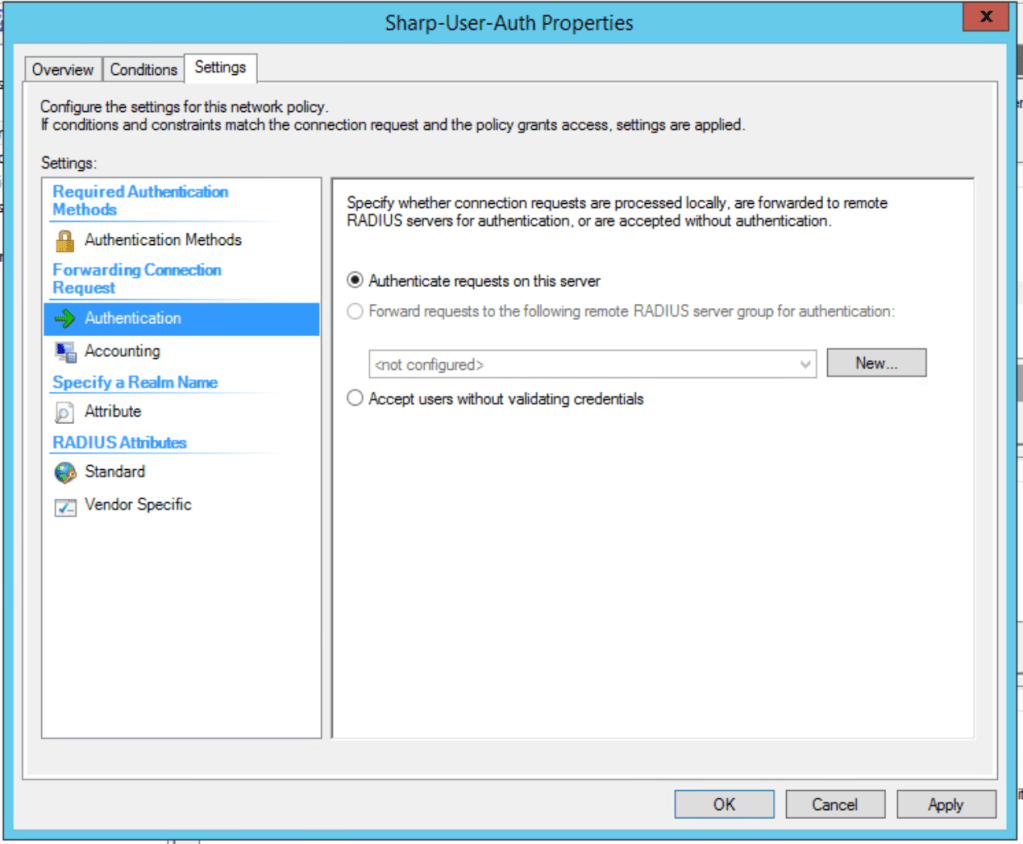
4. Leave the “Authenticate requests on this server” radio button selected and click “Next”. Complete the remainder of the wizard with default settings.
The video below shows the configuration from start to finish.
Create Network Policy
The network policy also specifies the NAS Port Type but adds the user criteria to match against and an EAP type. This is where we can return RADIUS attributes, apply constrains such as time of day, and specify the group(s) for authentication. Remember that the server certificate is used to create a TLS tunnel where the encrypted the exchange of authentication information takes place.
Below is the process of creating a Network Policy using the 802.11 NAS Port Type, using “Sharp House Wi-Fi” group for authentication, and specifying the EAP type as PEAP for phase 1 and EAP-MSCHAPv2 for phase 2:
1. Create a new user group. Members of this group will be granted access. This is optional. You can use the “Domain Users” group if you want all domain users to be permitted.
2. To create a Network Policy, right click on the appropriate folder and select “New”.
3. Give your policy a name and select “Next”
4. In specify conditions, add User Groups then search for the “Sharp House Wi-Fi” group. Also add NAS Port Type and select “Wireless – IEEE 802.11” and Click “Next”.
5. In the permissions window, leave the “Access granted” radio button selected. Click “Next”.
6. Click “Add” and select “Microsoft: Protected EAP (PEAP)” under EAP Types. Deselect all in the “Less secure authentication methods” section. Select PEAP in the window above, click Edit, verify the EAP Types within PEAP shows “Secured Password (EAP-MSCHAP v2)”. Select the certificate on the server that it will present to the user for verification. Click “Next”.
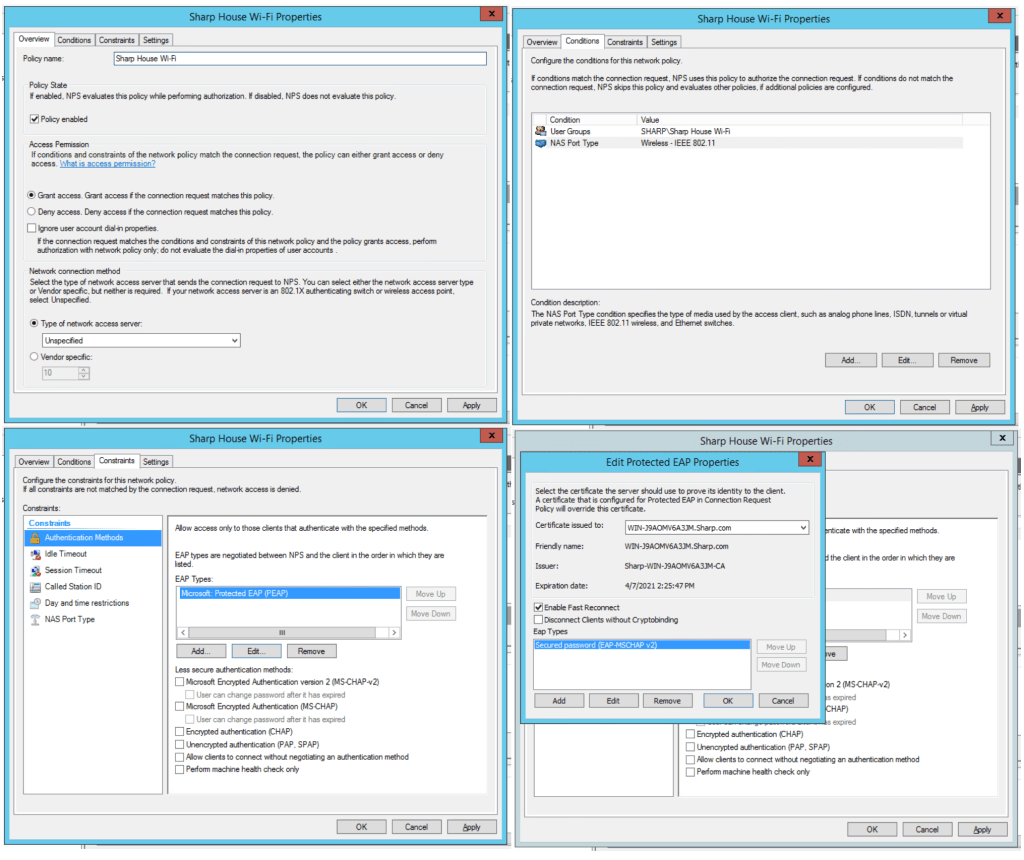
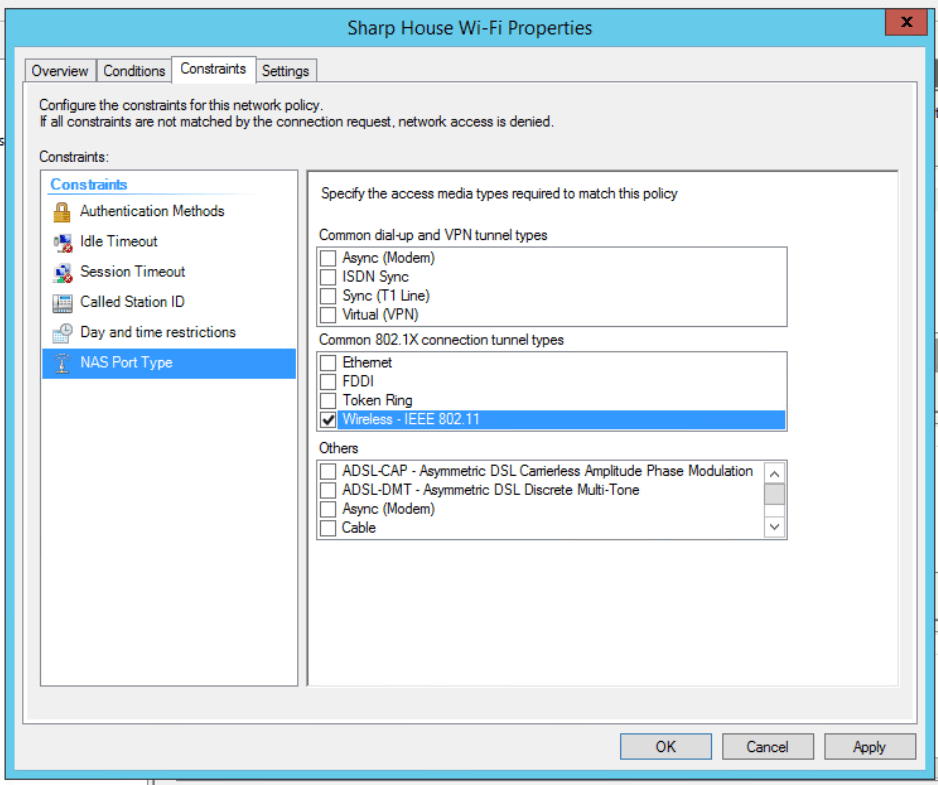
7. Under constraints, click “NAS Port Type” and check “Wireless – IEEE 802.11“. Click “Next”.
8. Leave the default RADIUS attributes. Click “Next”.
9. Complete the wizard by clicking “Finish”.
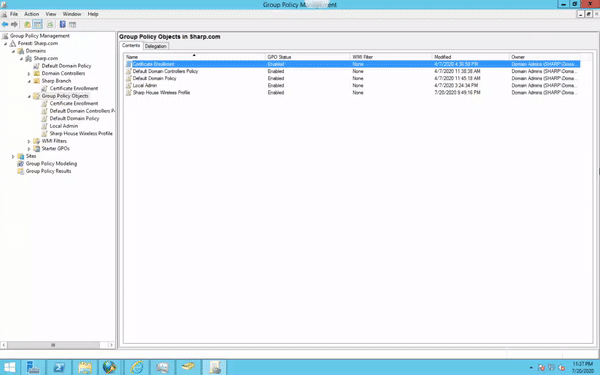
Step 4 – Configure Group Policy Object
The next step includes configuring a Group Policy Object (GPOs) to deploy a wireless network profile so the workstation joins the network automatically.
1. Open the GP Management console and create a new GPO.

2. Navigate to Computer Configuration > Policies > Windows Settings > Security Settings and click “Wireless Network (IEEE 802.11) Policies” then “Create A New Wireless Network Policy for Windows Vista and Later Releases” in the right pane.
3. Click “Add” and “Infrastructure” then enter your SSID and security information in the Wireless Profile Properties window. I am using user authentication, so I chose that option under “Authentication Mode:” in the Security settings menu.

4. Update the permissions on each GPO so that the “Sharp House Wi-Fi” group has Read access.
5. Since the GPO contains computer settings, link it to the organizational unit where your workstations are located. My OU structure is based on location; the computer accounts are placed under a different OU based on where they are physically located.
Step 5 – Validate and Connect!
It is now time to test your client. We need to verify that the following:
- Client has received the Wireless Network Profile
- Client can connect to the SSID
If you haven’t already, restart the workstation so it receives the GPO. You can also issue “GPUpdate /force” in the command line, but the windows settings are applied on startup.
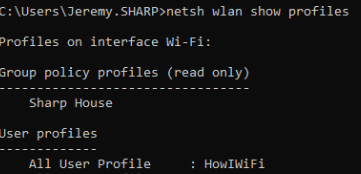
After the workstation has received the policy, you can use the command “netsh wlan show profiles” to view the list of profiles and “netsh wlan show profile “(Profile Name)” to view the settings of the profile. If you deploy a profile and need to make a change to it, you can view the details here to verify that the changes have been made and synced successfully.

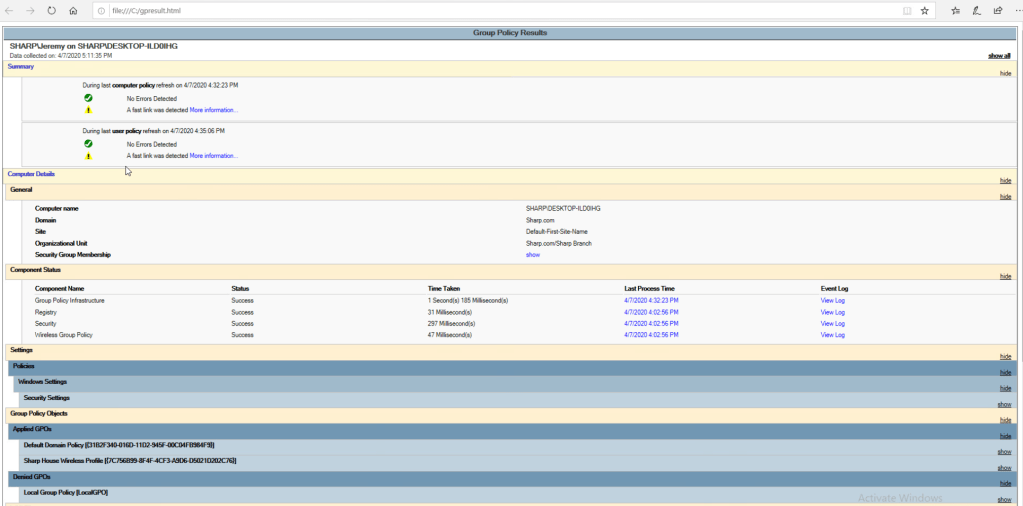
If you need to troubleshoot the GPO being applied to the workstation, you can run “gpresult /h C:\gpresult.html” from command prompt to create a report that shows the policies that the station has received and the status of the settings.
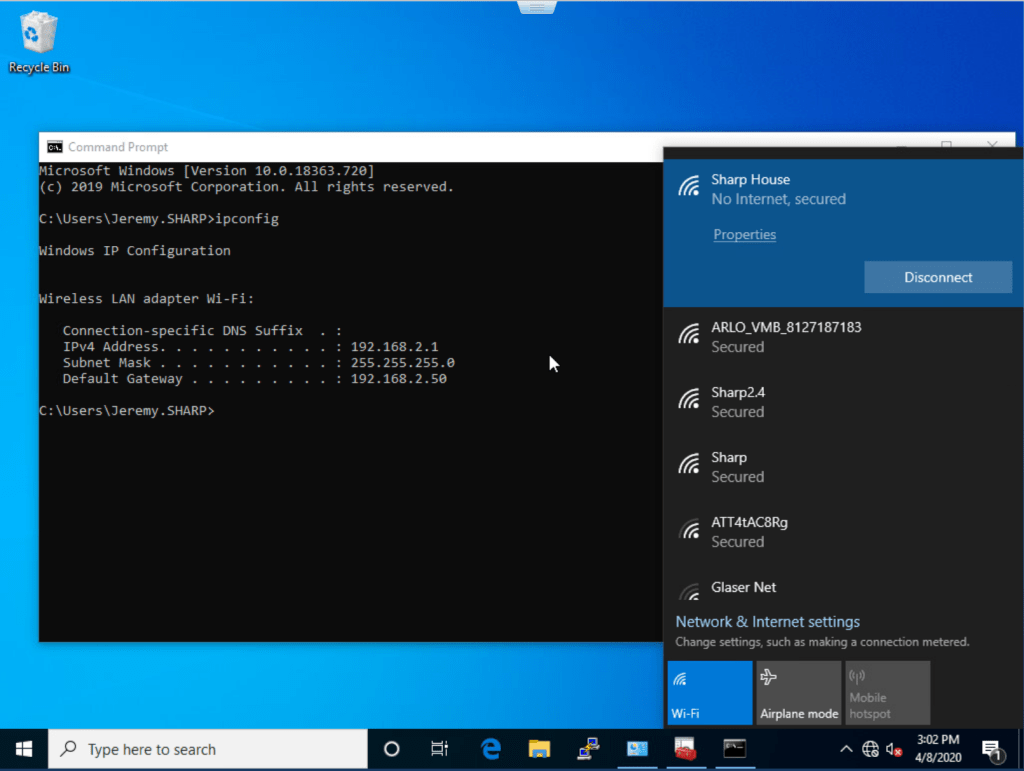
Now it’s time to test the connection! It should automatically connect. If not, you should attempt to connect, note the time, and start troubleshooting. Check out my post on Wireless 802.1X Troubleshooting for a detailed process!

I hope this guide has been easy to follow! This is a quick post on one of the most common tasks that I configure during a deployment, along with computer authentication. Stay tuned for my upcoming post on AAA override and role based access control using Windows NPS!

Leave a comment